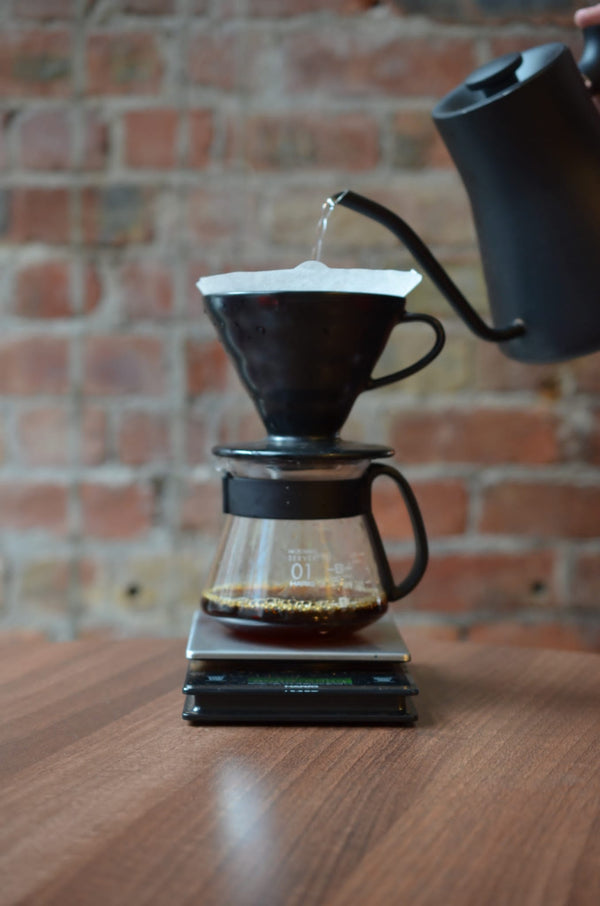
V60: A game changer in home brewing
Oct 10, 2022

The Hario v60 is perhaps the most commonly known and owned piece of coffee equipment in the world. Many variations of similar products exist, yet few have become equal in success as the Hario v60. The name comes from the shape; vector 60, relating to the 60o angle of the cone.
Hario was founded in 1921 and started out producing eco-friendly glassware products for chemical and physical use, but it wasn’t until 1949 that they launched their first home-use product; the glass coffee syphon.
Hario continued to develop their products, but the V60 didn’t appear on the market until 2004. After almost a quarter of a century of trying to replicate the cleanliness of cloth filtered coffee in a conical dripper, they were ready.
It was first made in ceramic and glass, but later plastic and metal versions became available, and finally copper, appreciated by many for its thermal conductivity.
After the 2010 brewer’s cup in London, the V60 gained a lot of publicity and its use became widespread. Despite many imitations and innovations by other brands, the V60 remains the best known and most widely used conical dripper. It’s a favourite among professionals and consumers worldwide, due to its versatility and ease of use, and it’s availability and pricetag.
Using the V60 can lead to some great coffee, but recipes can also be altered to suit the coffee you’re using and produce the kind of cup you’re fond of.
Here’s a basic recipe, but the joy really comes from experimenting with the variables, like coffee-water ratios, temperature, grind size, pouring/brewing time, agitating/stirring the grounds, pulse pouring, etc.
You will need:
Scales, preferably with a timer, but you can always use your phone.
A gooseneck kettle (for controlling the flow of water).
A Hario V60 or a similar device and filter papers for your device.
High quality water and great coffee, ground as freshly as possible.
A chopstick, or similar pointed object.
1. Boil filtered water between 90o to 96oC
2. Grind your fresh coffee beans. A good starting amount is 20g. A good coffee-water ratio is 1:15 to 1:18, but don’t be afraid to play with this.
3. Fold the filter along the seams and put inside the V60, with the seam against the handle.
4. Rinse the filter well using hot water, heating the V60 and the server and pushing the paper against the walls to get rid of any air pockets. This will get rid of any papery or bleachy taste in the papers too. It’s important to heat the V60; this will help maintain the temperature when brewing. Ceramic and glass V60s will take a little longer to heat, but will be quite stable when hot.
5. Place V60 on top of your vessel and put these on the scales. Put the chopstick in the middle of the paper standing upright and pour the grounds around it. In a gentle circular motion, lift and remove the chopstick, creating a small hole.
To pour:
Pour roughly double the amount of water as there is coffee in your V60, starting in the middle and working out in a clockwise spiral motion, from a height of around 10cm. Make sure all the coffee is wet and then let it bloom.
Pouring in to the centre hole allows the coffee to be saturated from the bottom up, and also reduces the risk of compacting the coffee unevenly.
After waiting for 30-35 seconds start pouring in a spiral again, starting in the middle. Try to pour slowly consistently.
The time is takes for the water to pass through the coffee will largely depend on your grind size and water flow but it should take between 2 to 4 minutes.
Again, it’s good to experiment with this yourself until you’re happy. Remember there are no wrong results and it pretty much boils down to taste, and will most likely change from coffee to coffee.
Variables to consider;
Coffee-Water ratios:
What we’re aiming for here is to get a desired maximum strength of coffee while still allowing the water to extract as much as possible from each grain of coffee. Put simply, the higher the amount of coffee increases the strength, but the water can only take on so many compounds, so we look to find a happy balance. This can be aided by the following variables too;
Grind size:
This will alter the speed that the brew is finished, but also affects the surface area. The finer you can go, the more equal the coffee brews, but the more sensitive it is to time and heat.
Water temperature:
Hotter water can really bring out the sweetness in some coffees but you have to be careful not burn the coffee. Darker roasted coffees, smaller beans or coffees with delicate flavours might taste better at a slightly lower temperature. The hotter the water, the quicker the reaction.
Time:
Try to strike a balance between extracting as much of the goodness out of the coffee as you can without going over. Too little time and the coffee might taste weak, too much and you might start to get some undesirable burned flavours.
You can also add water slowly by pulse-pouring. This method involves adding small amounts of water in pulses, rather than all at once. This allows the water to saturate the coffee grounds more equally, ensuring a generally more even extraction of the coffee.
Try playing with all of these variables one at a time, learning what effect they have, how they effect each other, how they can be used to get the best flavours from each coffee, and ultimately what works best for you.


